QEMU and VMM Setup
Installation
Section titled “Installation”To get VMM (Virtual Machine Manager) and QEMU installed and running on CachyOS, the process is thus:
# This will install the needed packages (note the "Windows 11" note below):sudo pacman -S qemu-full virt-manager swtpm# Force libvirt to use iptablesecho 'firewall_backend = "iptables"' | sudo tee -a /etc/libvirt/network.conf# This will add the user to the "libvirt" group so they can use it:sudo usermod -aG libvirt $USER# LXC backend (optional, for linux containers, enabling both backends does not conflict):systemctl enable --now libvirtd.service# QEMU backend (for VMs):systemctl enable --now libvirtd.socket# This will bring Internet up in a VM whenever one starts:sudo virsh net-autostart default# And to enable the entire VM network to have unfettered transit: (You should consider if you need more granular firewall rules based on your use case and security posture)sudo ufw route allow from 192.168.122.0/24The basics of creating a VM
Section titled “The basics of creating a VM”First, launch VMM, the first thing that will greet you are these things connecting:
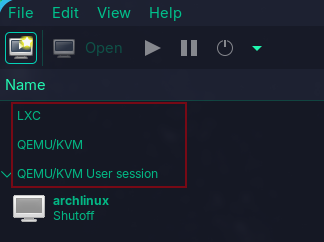
-
Next, click on
Edit -> Preferences -> ✅ Enable XML editingand close out of that sub-menu. -
Now you can create a new virtual machine, either by clicking the screen with a star and play icon or
File -> New Virtual Machine. You will be greeted with the vm creator, next to
Connection:you will see a dropdown menu, click it and select the appropriate one then proceedForward.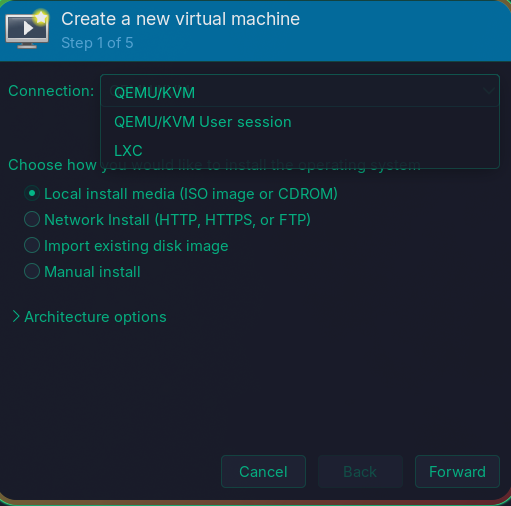
You will be asked to locate the
.isoimage of an OS you downloaded, click onBrowse...and locate it, you may also want to add or make a dedicated directory for storing .iso files, you can do so by clicking on the+ (Add Pool)button. If you want to reuse theUser Sessionpath for this, that one lives in~/.config/libvirt/.
example: CachyOS = Arch Linux.-
Step 3 is straightforward, simply give your VM however much RAM and CPU cores you like, this isn’t set in stone and is easily changeable.
-
In step 4, you can choose to create a virtual storage space (this creates a .qcow2 file), or a path for the VM to use.
-
In step 5, tick on
Customize configuration before install -> Finish. You will now land here:

Overviewconfirm that the chipset is Q35 and that the firmware is UEFI. Unless you’re installing something truly ancient or doing something silly, you never want any other variation here. If you’re making a Windows 11 VM, check if the TPM module has been added, otherwise head over to Add Hardware -> TPM then select either Emulated or Passthrough (see the note at the top) and Finish to close the sub-menu.-
Now click on
Begin Installation. -
If in a Linux VM (or another OS that uses OpenGL and/or ships libvulkan), head over to EGL Headless and/or Virtio-Venus respectively.
Final note
Section titled “Final note”If in a Windows 11 VM, to improve performance, you can:
- install Virtio-Win drivers from RedHat in the guest
- if you have an Intel iGPU, you can instead look into GVT-g and MDEV
- if you have an Intel iGPU and a dGPU, you can instead look into GVT-d
- if you have an iGPU and a dGPU or 2+ dGPU’s and want to pass a dGPU instead, you can look into VFIO