Managing Linux Kernels & Sched-ext framework with the CachyOS Kernel Manager
Installing a Kernel from a Repository
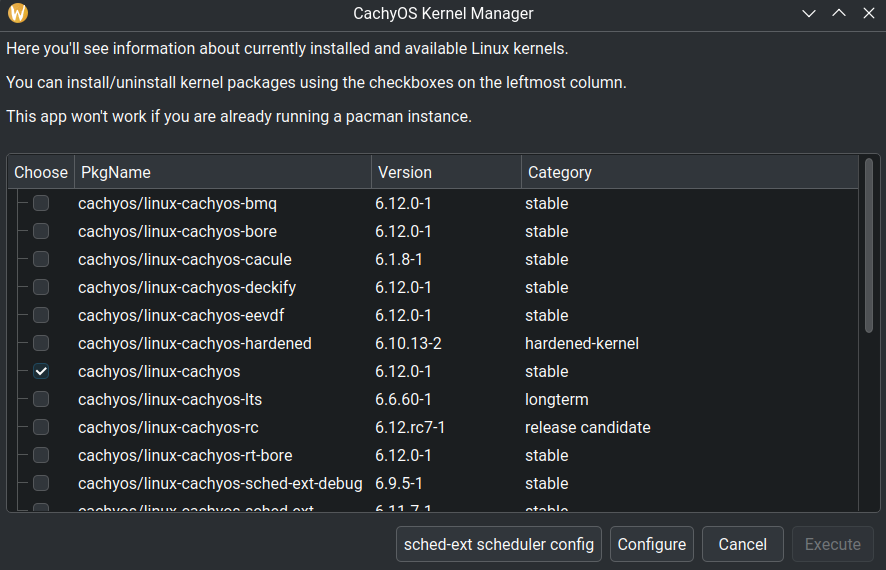
Section titled “Installing a Kernel from a Repository”The CachyOS Kernel Manager makes it simple to install and manage kernels from any Arch Linux repository.
To install a kernel. Launch the CachyOS Kernel Manager application and choose the desired kernel by ticking the box [] from the list of all the available options, then just press Execute to start the kernel installation.
To uninstall a kernel, simply uncheck the box [] next to the installed kernel you wish to remove and press Execute again.
Configuring and Building a custom CachyOS Kernel
Section titled “Configuring and Building a custom CachyOS Kernel”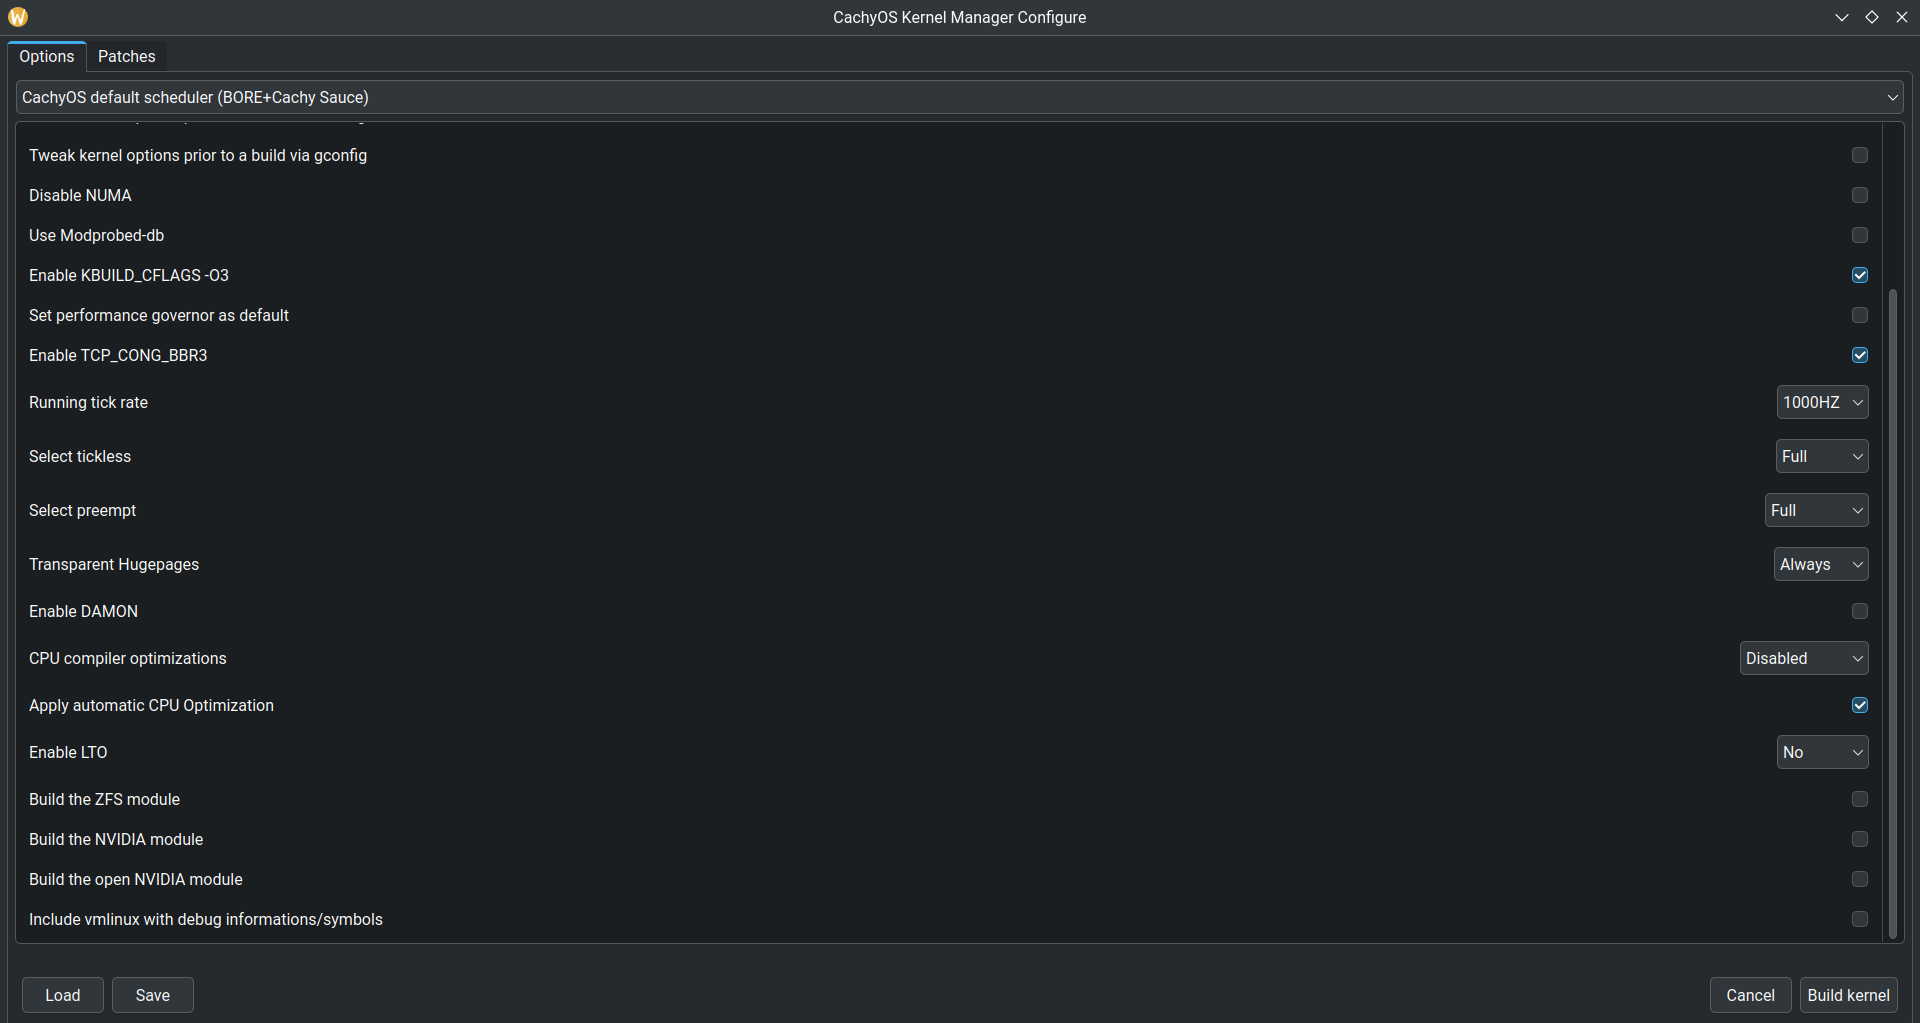
To get started. Open the Kernel Manager and click on the Configure button to start adjusting various settings, such as the desired scheduler, tick rate and more. Once you have made your desired changes, click on Build kernel to begin building your custom CachyOS kernel.
Built kernel packages and cache are stored in ~/.cache/cachyos-km/
Available configuration options:
Custom package name: With this option, you can name your kernel whatever you want. For example:linux-custom-cachy- Scheduler (BORE, RC, RT, RT+BORE, EEVDF and BMQ)
- Enable CachyOS config
- Tweak Configuration via nconfig, menuconfig, xconfig, or gconfig
- Enable/Disable NUMA
- Enable/Disable Modprobed-db
- KBUILD CFLAGS (-O3 or -O2)
- Performance governor as default
- Enable BBR3
- Tick rate selection (100Hz, 250Hz, 300Hz, 500Hz, 600Hz, 750Hz, 1000Hz)
- Tickless mode (idle, periodic, full)
- Preemption (Full, Voluntary or Server)
- Transparent Hugepages (Always or Madvise)
- Enable/Disable DAMON
- Enable/Disable Automatic CPU arch detection
- Apply kernel optimization for specific CPU architectures
- Enable LTO (Full, Thin, No)
- Build ZFS Module
- Build NVIDIA Closed Module
- Build NVIDIA Open Module
- Include vmlinux with debug information/symbols
- Load/Save Kernel Manager config preset:
(Only presets from the manager itself) - Kernel Patches Management (Remote and Local support)
Once the kernel has been successfully built, you will be prompted for your sudo password to install the kernel.
Sched-ext Framework Management
Section titled “Sched-ext Framework Management”The Kernel Manager provides a graphical user interface (GUI) for managing and controlling sched-ext schedulers. Access the GUI by clicking on the sched-ext scheduler config button in the main window.
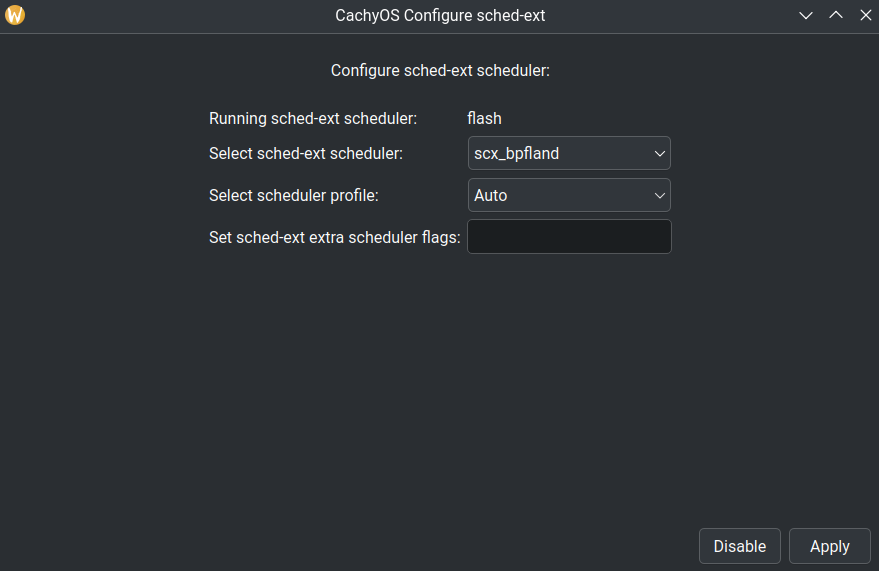
This GUI allows you to:
- Switch between different sched-ext (scx) schedulers.
- Enable or disable the scheduler service.
- Check the currently running scheduler.
- Set scheduler flags and profiles.
In order to achieve this, the Kernel Manager uses the scx_loader with a configuration stored in /etc/scx_loader.toml.
For more information about the scx_loader configuration file, check this documentation.
- How does the
scx_loaderwork?- Once you have selected the scheduler and profile, the scx_loader will then start the scheduler with the profile that has been selected and save this configuration to the
/etc/scx_loader.tomlfile in order to achieve persistence across reboots. An example of what the file will look like choosingscx_bpflandwith theGamingprofile:default_sched = "scx_bpfland"default_mode = "Gaming"[scheds.scx_bpfland]auto_mode = []gaming_mode = ["-m", "performance"]lowlatency_mode = ["-k", "-s", "5000", "-l", "5000"]powersave_mode = ["-m", "powersave"]
- Once you have selected the scheduler and profile, the scx_loader will then start the scheduler with the profile that has been selected and save this configuration to the
Scheduler Profiles
Section titled “Scheduler Profiles”- What are the “profiles” for?
- They are presets for the scheduler that modify flags based on proven combinations to enhance effectiveness for specific use cases, such as “Gaming.”
Check all the details about the profiles in the scheduler guide.